Cascading Fuchsias and Toddler Tangling
My Cascading Fuchsias Market Bag is finished! I felted the bag last night and I'm just waited for it to dry before having the lining put in. I am not a confident seamstress so a friend is doing it for me. I should get some finished project pictures up in a week or so depending on how long it takes her to put in the lining.
Here are a few pictures I took before the bag was felted.

The green floral fabric will be the main lining, and the two other fabrics will be used for contrasting pockets. I can't wait to see it when it is all done! I think it will be sooo cute!

By the way...A two year old+a ball of yarn+30 seconds unsupervised=

The Swallowtail Saga
Spring has officially sprung around here! I am so excited because I can finally wear my Swallowtail Shawl that has been hibernating in my drawer all winter long.


Yes, this is a last year's knit. (You didn't think I just whipped it up real quick did you?) The pattern is from the Interweave Knits Fall 2006 issue. This was my first "real" lace project. What I mean by that is that there is quite a difference between knitting a lace pattern on a scarf using a worsted weight yarn (fake lace knitting) and knitting with a lace weight yarn on small needles (real lace). Anyone who has done both types will most likely agree.

Knitting real lace is terrifying. The tiny thread-like yarn, the endless yarn overs and ssk's. And don't forget the teeny tiny chart with the teeny tiny squares filled with what looks like hieroglyphics. It was a bit intimidating. But nothing motivates me more than a challenge. I wasn't going to give up.


So I started knitting from that ridiculous chart, marking my place with 2 sticky notes, counting every stitch, and highlighting the rows when I completed them. I was concentrating so hard, and looking back and forth between the project and chart so many times, that my head was spinning and my eyesight blurred. I stopped after a few repeats wondering how people enjoy knitting lace.

Over the next week I trudged on, obsessed with this lace shawl. After a few days of getting used to the charts my eyes stopped bleeding, and it got more and more enjoyable. I was getting the hang of it. I got into a rhythm, the rows were flying by. I grew to love my project. About halfway into it I was feeling quite smug. I could knit "real lace". I started to wonder what all of the fuss about it was. It was EASY.

I was fantasizing about my daughter wearing my lace shawl on her wedding day, and then wrapping it up in tissue paper and handing it down to her daughter. Future generations were going to treasure it as a prized family heirloom and whisper among themselves, "Can you believe that this was made by our Great-Grandmother Alana? She was such an accomplished knitter."


Before long, I was on my final row. It had been a long time since I had made any errors, but I was still putting my lifelines in with scrap yarn in case I needed to rip back. Due to my extreme over confidence and knitting smugness I got a bit lazy with the lifelines at the end. By the time I had reached my final row, my last lifeline was about 20 rows down.

So pleased with myself about being almost finished, I got up off of the couch carefully setting down my shawl, to take a bragging break. After stretching and bragging to my husband a bit about being so awesome at knitting, I then skipped off to get a glass of water and quickly use the restroom.

I then plopped my "lace knittin' genious self" back down on the couch ready to finally finish my family heirloom lace masterpiece.

I'm sure you can see where this story is headed, to nowhere good. No matter how good of a knitter you think that you are, a lace project can always put you back in your place.

When I had picked up my project to work the FINAL row, ten stitches immediately slid off of the end of the needle and unraveled about 10 rows down. There are no words to describe the terror. After taking a bit of time to have a pity party for myself, I weighed my options. Should I rip it back 20 rows? At that point in the pattern each row was 200 stitches or so across. To take it back out and reknit was going to be ALOT of work. I decided to try to weave up the stitches back into place keeping with the lace pattern. I could do that, right? I worked painstakingly for about an hour chanting the whole time to myself, "Oh no, oh no, OH NO." This is where the moral of the story comes in.

I wasn't a lace knitting genious after all.


I couldn't do it. So I faked it. It doesn't look perfect but it looks just fine. Only the people that I point it out to can tell. What is it about us knitters that we feel that we need to point out the errors in our projects to everyone we meet?


Anyways, it was finally off of my needles. I then annoyed my husband by running around the house with it fluttering behind me and asking incessantly how much he liked it.

I then proudly blocked it. For everyone who has completed a lace shawl, you know that blocking is what brings out the true beauty. It spreads out the stitches and shows off the beautiful stitch patterns.

I love my shawl so much that I've been afraid to wear it. It has only come out of its pillowcase that it lives in only a few times. What is the point of knitting something if you don't use it?


This year will be different.
Knitting and Gifting in April...
Having two works in progress just wasn't enough for me and I was forced to cast on something new.


Last Friday or so I started the Cascading Fuchsias Market Bag by Nora Bellows.

Since I took this picture last Saturday I have finished knitting the bag body and one flower. I should be done and ready to felt in just a few days!


This project has been fun because I have gotten to switch back and forth between the mindless bag knitting and the intricate flower construction. It has been an enjoyable balance.


As I have mentioned before on the blog, I really enjoy making and giving hand knit gifts. I am making this bag for a family friend that I will be seeing at the end of this month. I will also be starting a scarf for a friend of hers that I will be meeting for the first time. I hope that they like their gifts. It can be so hard to pick out presents for others especially if you have never met them.

When The Scarlet Skein first started carrying this pattern in the shop I didn't think that much about it. It was cute but I didn't have a "have-to-cast-on-right-now" moment. A few weeks ago, however a customer came in with her finished bag and needless to say I immediately started picking out colors. Although attractive, the pictures on the pattern don't do it justice.


It is even cuter in real life.

Nora Bellows is an awesome bag designer anyways. All of her designs are great. Last year, before the blog, I made the Night Garden Evening Bag as a purse for Ava.
She loves it! It's the perfect size to hold her crayons, paper, sticker book, and pretend wallet. She carries it around everywhere.
What I especially like out of all of Nora's designs are the ingenious flowers. I really like the Camellia Flower pattern. Here I knit and felt the Camellia flowers and sewed them onto a felted diaper bag that I made. (Again, this is before the blog.)


I also did some non-felted versions here out of Cascade Fixation for some headbands I made for Ava.


Clapotis
I've finished knitting the Clapotis.


I just love it. It was a nice simple project with just enough interest to not cause me to go brain dead. I can see now why this has been such a popular pattern. I especially enjoyed using this fabulous yarn. It is maybe the nicest yarn that I have ever worked with. It is insanely soft and the color saturation is outstanding.


Some Clapotis beauty shots for you..


Right side of the fabric.


Wrong side of the fabric.

I love the dropped stitches!

It adds so much drape and texture. It produces an airy lighter fabric that makes it that perfect wrap for spring and fall when it is a bit chilly out but not freezing. At least in the area that I live anyways.

The other great thing about Clapotis is that it can be worn in many different ways. It can be worn as a chunky scarf around your neck...


Or it can be a shawl-like wrap around your shoulders.

It even looks great with the wrong-side showing!

I ended up using 3.5 skeins of Lorna's Laces Lion and Lamb and size 9 needles for this project. As I had previously mentioned, this yarn is decadent. I have however seen the Clapotis made up in other beautiful not quite as err.. expensive yarns. Noro Silk Garden looks great in the project. Really any yarn that self-stripes or is variegated is really shown off by this pattern.

But as for me... I am planning on enjoying my super decadent Clapotis.

Clapotis Class

If you would like your very own Clapotis to wrap yourself in, come sign up for the Clapotis Class. It is a one time two hour class. I will help you pick out your yarn, do a gauge swatch, and learn the stitch pattern. It's a pretty simple project, perfect for a new knitter.


April Class Dates:
Saturday, April 12 at 1:00 - 3:00 pm or Wednesday, April 23 at 1:00 - 3:00 pm
Cost is $25

I will be offering this class again over the next couple of months so be sure to check The Scarlet Skein's website for future dates and times. If you have any questions about the class or to sign up, please give me a call at the shop.
805-466-YARN.
Terese

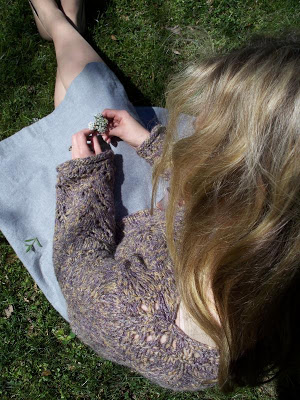
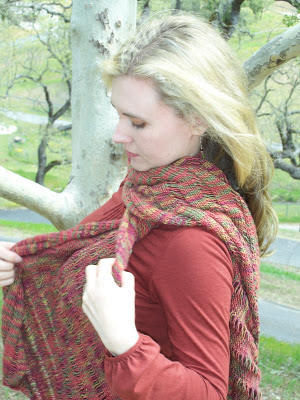
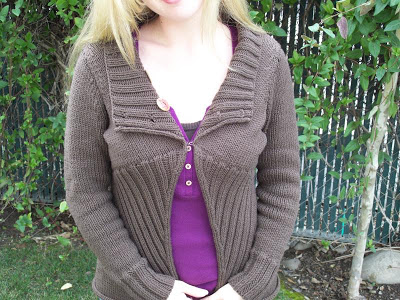
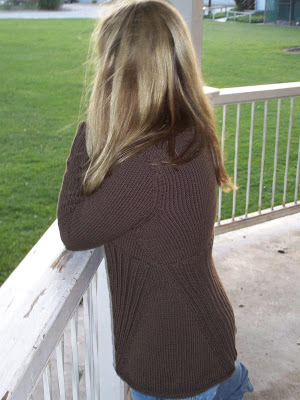
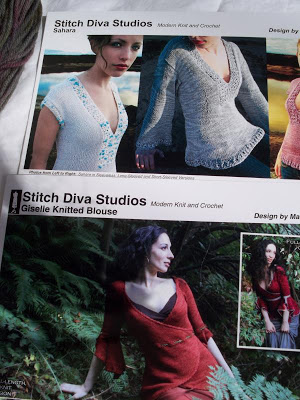
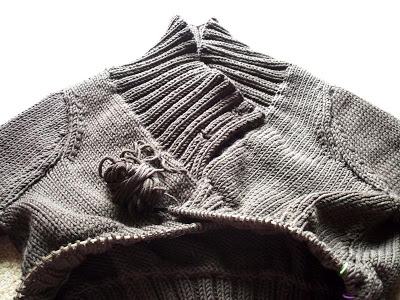
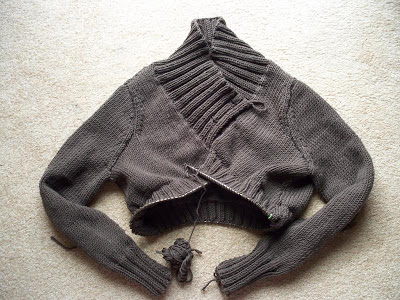
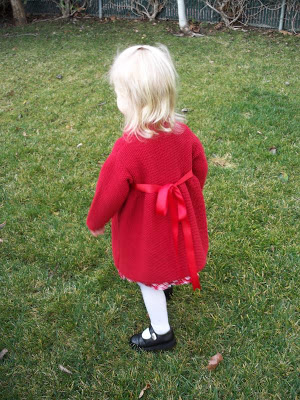
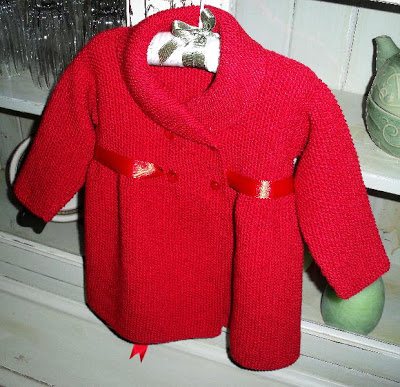
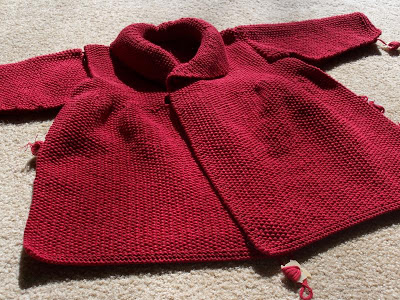
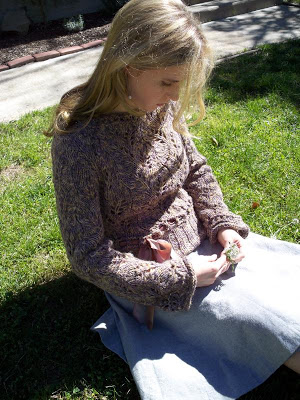
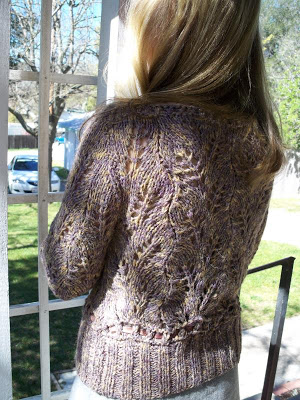
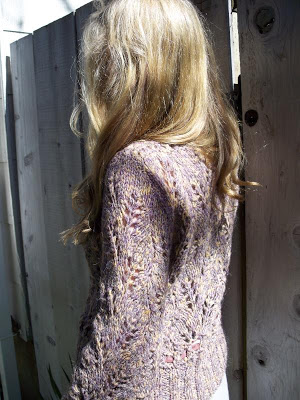
The Terese sweater is done! I am really happy with how it turned out!

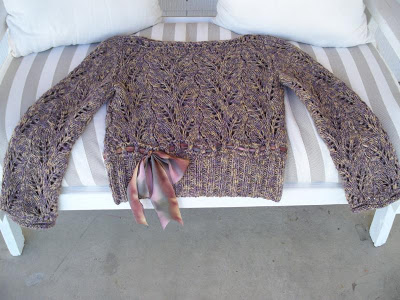
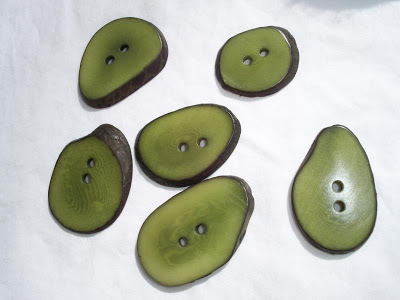
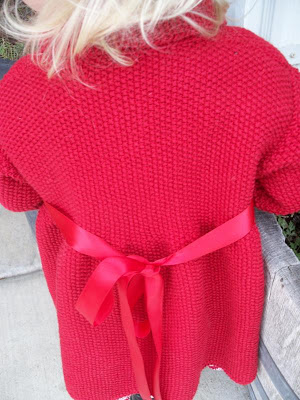
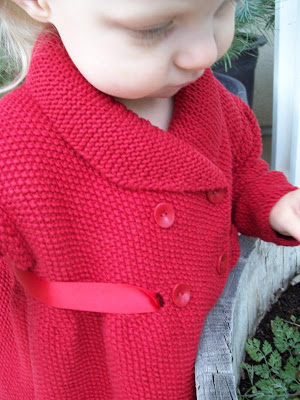
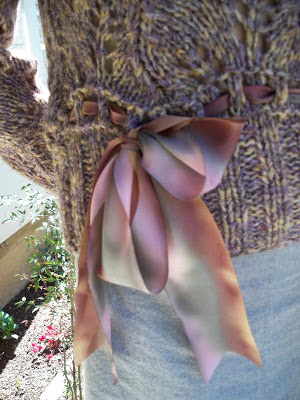
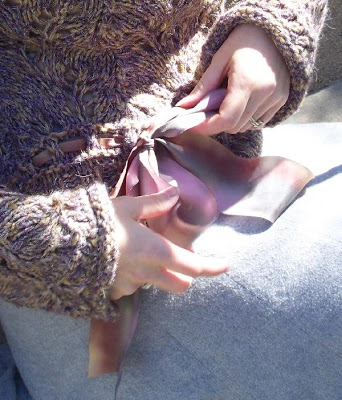
It turned out so feminine and elegant. Just what I was hoping for, and the silk ribbon added the perfect touch.

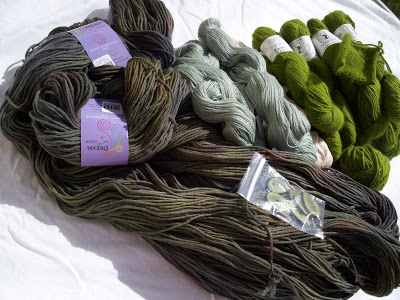
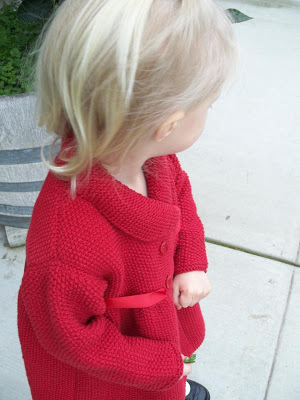
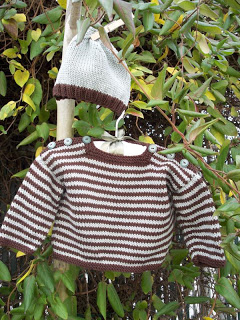
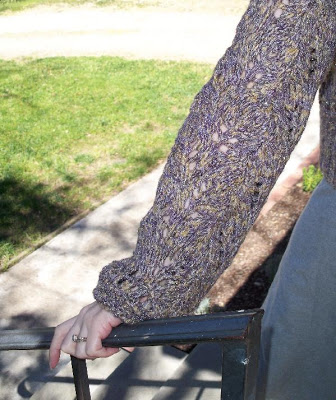
I used 7 skeins of Thalia with some leftovers. I made two modifications. I made the tunic style sleeve pattern instead, and I worked the sleeve pattern one inch shorter before starting the sleeve cap. I must have short arms because the sleeves are still plenty long.

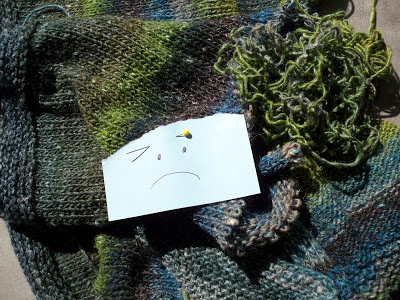
As I had mentioned before I had a little trouble knitting the front the first time around. I don't want anyone else to be frustrated so I am including the instructions for what I did.

I followed what the pattern note said and worked half pattern repeats when I decreased.

To Fit Size :32-34 only

For the front and back sections:

(What I did that was really helpful is put a stitch marker in between the lace pattern repeats of each row.)

Work pattern as directed until it says shape armholes.

Row 1: cast off 2 sts. Work 5 sts in St st. Work next 8 sts as the last 8 sts of pattern chart. You should now be at your first stitch marker. Work the rest of the repeats in lace pattern as normal.

Row 2: cast off 4 sts purlwise. Purl to the last st. Knit the last st.

Row 3: k1, ssk, k2 work last 8 sts of lace pattern chart, sl marker. Work middle repeat sections as normal. On last lace repeat section work first 8 sts on lace chart, k2, k2tog, k1. (12 rem in first and last section)

Row 4: k1, purl to last st, k1

Row 5: k1, ssk, k1, work last 8 sts of chart. Work middle sections as normal. On last section work first 8 sts of chart, k1, k2tog, k1. (11 sts rem in first and last section)

Row 5: Repeat row 4

Row 6: k1, ssk, work last 8 sts of chart. Work middle sections as normal. On last section work first 8 sts of chart, k2tog, k1 (10 sts rem)

Row 7: Repeat row 4

On following right side rows: k2, work last 8 sts of chart. Work middle sections as normal. On last section work first 8 sts in chart, k2.

On following wrong side rows: Repeat row 4

Continue until armhole measures 6.5 inches and proceed with next instructions from the pattern.

For the sleeves:

Work sleeves as written until the pattern says shape sleevehead. Sleevehead???

Row 1: cast off 4 sts, k4, work last 8 sts of lace pattern chart. Work other sections as normal.

Row 2: cast off 4 sts purlwise, p to last st, k1

Row 3: k1, ssk, k2 work last 8 sts of chart. Work middle section as normal. On the last section work first 8 sts of chart, k2, k2tog, k1.

Row 4: k1, p2tog, p to last 3 sts, p2tog through the back loops, k1.

Row 5: k1, ssk, work last 8 sts of chart. Work middle section as normal. On the last section work first 8 sts of chart, k2tog, k1.

Row 6: k1, purl to last st, k1

Row 7: k1, ssk, work the rest of the first repeat section in St st. Work middle section in lace pattern as normal. On the last section work in St st to last 3 sts. k2tog, k1

Row 8: Repeat row 6

Repeat the last 2 rows until 24 sts remain ending on a right side row.

k1, p2tog, p to last 3 sts, p2tog through the back loops, k1 (22 sts rem)

Finish sleeve as specified in pattern.

Killing Klaralund
Obituary
Klaralund (May 2007 - March 2008)

Klaralund was born as a beautiful new project to Alana who cast on excitedly in May of 2007. She was devotedly knit on for weeks until she became ill with "boring-to-work-on-itis." She then shrunk in size and ended up being too small for the knitter. (Klaralund claimed that it was the knitter who got a bit bigger...) Since then she has been living in a zip up pillowcase package desperately holding onto the needles that sustain her. She unfortunately lost her battle on March 16, 2008.


With so many sweater projects that I want to start, I had to let go of the half finished sweaters that I knew weren't going to turn out right. Klaralund is a beautiful sweater pattern but I unfortunately picked the wrong size in the beginning. In denial I kept on knitting hoping I'd lose a few pounds and reassuring myself that I could "just block it out." The fact of the matter is that it would have truly looked terrible on me. And I didn't want to waste 8 skeins of Noro Silk Garden on an unflattering sweater.


I HATE ripping things out but I knew it was the right decision.


I frogged the whole thing.... the front, back, and half of a sleeve. It was a little painful but I just kept thinking of the Sunrise Circle Jacket that I want to knit up from all of this Noro.

In other news I killed the Seedling Sweater too. The fabric was wierd because I had to use such a large needle size to get gauge and I wasn't even sure if I was going to have enough yarn to complete it.

But I don't just murder sweaters, I finish them too. The Terese sweater is done!! It looks great. I hope to take some proper pictures of it tomorrow.

Louisa Harding Love


I've got myself a new project!


The Scarlet Skein has recently started carrying Louisa Harding's new collection for Spring, and I am in love. (Sorry Husband) So of course I didn't mind when I was asked to knit a sample for the shop. Louisa's new book Dauphine is amazing and full of feminine Marie Antionette-like designs. One of the interesting thing about this new book is that all of the designs are knit from ribbon yarns. The sweater I chose "Terese" is knit with a ribbon too. I have never knit a sweater out of ribbon before so it is really fun for me! The yarn that I am using is new as well. It is called Thalia.


It is a lightweight gauzy ribbon. It is surprisingly soft because it contains 12% mohair and 6% wool. Mohair is usually my arch enemy but isn't bothering me with this project. Maybe it's because there is so little of it. I have really never knit with anything like this before. If you live locally you should come by the shop and see it for yourself. It is really unique.

It is knitting up surprisingly fast (I am using size 11 needles!) and I think that the stitch pattern is gorgeous. I've already knit up the front and am working on the back. I should be able to get this sweater off of the needles in a week or so.


The project has been a bit frustrating to me but it's really not entirely Louisa's fault. To be perfectly honest with you this is the 3rd time I have knit the front! Ok... so you know how this is knit in this beautiful lace pattern?


Well when it came time to decrease for the armholes I was trying to decrease in the lace pattern. I was struggling and struggling trying to match up yarn overs yet control my stitch count. I was hating Louisa. After all it couldn't be my fault right? Then I looked down at the pattern and saw this...

Pattern Note:

Do not work any incomplete patt reps, work half patt reps or take extra sts into st st.


Well I guess reading any Pattern Notes before starting your project is a good idea. I ripped it back. As I was ripping I saw a mistake in the lace pattern on the second row. I thought... well as long as I'm ripping I'd better fix that one too. Ok... back on the needles I am knitting away.... this time I decide to work the side lace panels in stockinette while I am decreasing. I tell myself, "Forget the lace pattern on the sides!" That was not a good idea. I had tried to take the "least brain activity" way out of this but the finished result was really bugging me.

When I was done ripping it out for the second time I started ripping out my hair as well. At this point I also threatened what was left of Terese with a pair of scissors. I was feeling a bit disappointed in Louisa. Why couldn't she just TELL me what to do instead of these vague "pattern notes"? Thankfully, the third time worked out. I worked half pattern repeats from the decreases on. It took a bit of figuring, but I will be kind and share the method in a future post for anyone who wants to knit this sweater. Outside of that problem everything has gone fine. I like the yarn. I like the pattern, and yes I like Louisa Harding again.

You can see how fast this sweater knits up for me to practically knit the whole front 3 times in one week. If I would have figured this out sooner I could have been almost done with it by now.


I also have my eye on this design as well. It is just so pretty to me. I think one of the reasons I like these designs is because they are dressy and I just have never knit a dressy sweater before.


Besides Terese, I am also knitting away on my Clapotis. I want to get both done by the end of this month. Which I should be able to do if I don't have to rip out anything else.
Stand Mixer Cover Completed!
Whew... was I glad to finally finish that stand mixer cover! It has been weighing on my mind and my needles for months! As I had previously mentioned, I had knit it for a customer (and family friend) to match an old knitted tea cozy that she owns.

(Ava thinks that these are "Mama" and "Baby" hats.)

These cozies would probably look ridiculous with my kitchen decor but will look really cute in her kitchen. I hope that she likes the finished product, I think that it matches really well. I've posted the pattern for anyone who is interested in making the stand mixer cover.

Stand Mixers need Outfits too...
Stand Mixer Outfit
by Alana Dakos


Is your stand mixer feeling like a “plain Jane’’ sitting there on your countertop? Dress it up and keep the dust off with a fun Mary Engelbreit inspired cozy.


SIZE:
One Size. Designed to fit over a standard size Kitchen Aid Stand Mixer.
(It is a tight fit to show off your stand mixer’s curvy figure.)


FINISHED MEASUREMENTS:
16 inches tall

MATERIALS:
[MC] Red Heart Super Saver 100%Acrylic; 364 yd/333m per 198g skein]; color: Black; #1 skein
[CC] Red Heart Super Saver 100%Acrylic; 364 yd/333m per 198g skein]; color: Off White; #1 skein
[CC2] Red Heart Super Saver 100%Acrylic; 364 yd/333m per 198g skein]; color: Burgundy; #1 skein (You just need a small amount for the optional Pom-pom on top.
*If you do not want to use an acrylic yarn, a worsted weight superwash wool would be a great option.

#1 16 inch US 9 circular needle
#1 24 inch US 9 circular needle
#1 32 inch US 9 circular needle
#1 set of US 9 double pointed needles

Stitch Marker

Tapestry Needle

Pompom maker (optional)

GAUGE:
16 sts/20 rows = 4" in stockinette stitch using size US 9 needles

PATTERN NOTES:
Kitchener’s Stitch- Thread a tapestry needle. With RS facing and holding one DPN at the front and one at the back, insert tapestry needle into first st on front needle PURLWISE. Then insert tapestry needle into first st on back needle KNITWISE. *Next, insert tapestry needle KNITWISE into first st on front needle, pull it off of the needle, and insert yarn needle into second st on front needle PURLWISE. Next, insert yarn needle PURLWISE into first st on back needle, pull the st off of the needle, and insert tapestry needle into the second st on back needle KNITWISE. Repeat from * until all sts are worked.

It is a good idea to try on your stand mixer cover as you go, this will help you to figure out if you are staying on gauge and not pulling your yarn too tight.


PATTERN:
With [MC] black cast on 222 stitches onto size US #9, 32 inch circular needle. Place a marker and join into the round being careful not to twist your stitches.

Round 1: With [MC] black k 6 sts, leaving black yarn in the back of your work, add [CC] white and k 6 sts. Keep alternating between black and white every 6 stitches for the entire round, pulling the yarn as tight as you can every time you switch. (This produces the rippled texture. It’s really important to pull tight for the first few rounds, but you don’t have to pull as hard as you progress in the pattern.)

Rounds 2-4: Work the same as Round 1

Round 5: With [CC] k 6 sts, switch to [MC] k 6 sts.

Rounds 6-8 Work the same as Round 5

Repeat Rounds 1-8 17 times more and then Rounds 1-4 once more.
(Total of 37 Stripes, should measure approx 14 inches from cast on edge)

Start decreasing rounds and switch to smaller circular lengths when the stitches get uncomfortably tight around the needle.


Decrease Rounds:
Round 1: ( [CC] k 6 [MC] k1, k2tog, k3) repeat around
Round 2: Work round as set without decreasing
Round 3: ([CC] k1, k2tog, k3 [MC] k5) repeat around
Round 4: Work round as set without decreasing
Round 5: ([MC] k1, k2tog, k2 [CC] k5) repeat around
Round 6: ([MC] k4 [CC] k1, k2tog, k2) repeat around
Round 7: ([MC] k1, k2tog, k1 [CC] k4) repeat around
Round 8: ([MC] k3 [CC] k1, k2tog, k1) repeat around
Round 9: ([CC] k2tog, k1 [MC] k3) repeat around
Round 10: Work round as set without decreasing
Round 11: ([CC] k2 [MC] k2tog, k1) repeat around
(At this point you may need to transfer to DPN’s)
Round 12: Work round as set without decreasing
Round 13: ([MC] k2tog [CC] k2) repeat around
Round 14: Work round as set without decreasing
Round 15: ([MC] k1 [CC] k2tog) repeat around


Divide remaining 38 stitches evenly between 2 double pointed needles.
(19 on each for the mathematically challenged)
Kitchener stitch the remaining stitches together.

FINISHING:
Weave in ends. Make and sew on a pompom using [CC2] if desired.


Put your new cover on your stand mixer and admire your hard work!
Tilted Duster

I know that I've already posted pictures of the Tilted Duster being worn at Stitches West but I didn't get a chance to post the information that I wanted to about it.

First of all, I am really mostly happy with how it turned out for me. I used 13 skeins of Filatura Di Crosa Zara Plus which is a machine washable and dryable 100% merino wool. I had already washed the sweater before wearing it and it held up perfectly in the washer and dryer!! I am so excited to have an easy care hand knit sweater! I hate washing sweaters in the bathtub! I am also so happy that this entire sweater cost me only approx $26 because I used some sale yarn that I got 75% off! Pretty awesome huh?

I also like how fast it was to knit up. If you have followed the blog you'll know that I started it months ago, knit the fronts and the back and then set it down. I didn't get back to it for a long while due to other knitting obligations. When I picked it back up it only took me 9 days to knit the sleeves, the collar, the skirt and seam it up! This is definitely a sweater that anyone could knit in a month's time.

The Tilted Duster is also versatile. The collar can be worn buttoned up or folded back like a shawl collar.


So now for the dislikes... I tried it on before picking up stitches for the skirt and the top part was too big. And as you can tell in the picture it does pucker up some. The weight of the skirt did help it lay better but I still wish that I had knit the 32" size instead of the 36" Since I measure 34" I thought that it would be safer to go up a size. Well in this case I think it would look neater if it was a little more form fitting at the top. To compensate for the big top I knit the smaller size in the skirt. I was just so afraid that I was going to look like a brown saggy blob in an oversized sweater. I don't know if this was the best idea but it turned out fine in the end. I also knit my sweater one repeat shorter than the pattern called for. Why you may ask? Did I think that it would flatter me more? No... I ran out of time the night before I went to Stitches. I really wanted to wear it and ahh.. well... it was 2:00 in the morning.

I did really find some helpful hints for the duster from the Ready Set Knit podcast. They did a Tilted Duster knit-a-long and posted some good tips here.


All in all, it was a good project. My sweater is really comfy... too bad it is getting hot outside.
And the Winner is.....
Thank you, thank you, thank you for all of the great suggestions for my Sea Silk dilemma. I really enjoyed all of the different patterns that were submitted. I was disappointed because a lot of the patterns that I liked required more yardage than I have available, so I wasn't able to pick them. After careful thought I decided to go with Knot Knitting's suggestion and make the Melon Shawl from the book Victorian Lace Today.

Congratulations to Knot Knitting! (I will be sending you a message via Ravelry so that you can pick out your prize.)

To everyone else that participated, thank you again and I really appreciate all of your great ideas.
Stitches West 2008


We just got back from Stitches. It was quite an experience! It was so completely overwhelming. There was soooo sooo much to look at and so many people. I thought that I'd want to be there all day for two days but after a few hours I found myself dizzy, tired and ready to go!
There were so many fun and beautiful yarns to look at and I bought my share of them....
"Yay...Sale yarn!"
There is like a trillion pictures of me here... sorry....
I was really expecting to see some knitters wearing Tilted Dusters because I know how popular the pattern is. I wanted to take a picture with one of them or something. I did end up seeing one the second day but of course by then I wasn't wearing mine. I did, however, see a ton of people wearing the Clapotis shawl. I also saw several several booths that had Clapotis knitted up as samples. I was really proud to wear my Tilted Duster though. I was so pleased by how it turned out!
Well...you don't see that sorta knitting every day!! Check out the size of those needles!
I love yarn....
Pretty view outside our hotel room..
New Stuff
1,000 yards of Dream in Color "Classy" I have this in mind for the Forecast sweater but I'm not sure if it will work with a variegated color...
This yarn I bought on sale. A whole bag of Elsebeth Lavold Angora. I know that you might think that this is the most disgusting color manufactured but I happen to love it..
I think that this would be perfect for the Lush and Lacy Cardigan.
These buttons are actually dyed nut slices. Cool huh? I thought maybe I could use them for the Angora sweater or Dream in Color sweater.
I also purchased two lace weights. A 100% silk in cream, and silk/wool blend in green. It appears that I like the color green.
I have plans for someday knitting some of the shawls I like out of "Victorian Lace Today".
This is Malabrigo Lace yarn that I got as a sample. Isn't it pretty?
I am sooo excited about these Stitch Diva patterns! I want to cast on for the Giselle Knitted Blouse immediately!!! But I really shouldn't.
Tilted Duster Frenzy
I have been doing a lot of knitting lately. This month I have so far seamed a sweater, made a pair of Felt Clogs, worked on the dreaded stand mixer cover, knit the heel of my sock, made two samples of the new pattern I am submitting to Knitty.com, started a Clapotis, and knitted a whole bunch on this Tilted Duster! I have been knitting crazy fast on this because I have this little fantasy of wearing it this weekend when I go to Stitches! This will be my first time attending and I guess that I just want to look "cool" wearing a hand knit sweater, and a new one at that. I think that I can finish it by Friday night if I knit like a crazy person.


On the way to Stitches in the car and while I am there I am planning to complete at least one more sample for my new Knitty submission. I have to turn that in by March 1st. So many deadlines!! If I finish that up with time to spare I HAVE GOT TO finish that stand mixer cover!!! I have of course neglected it again to get all of these um... important (?) knitting projects done.

By the way I am a little sick of always referring to it as the stand mixer cover. The name makes it even seem more boring. Can anyone think of a cool name for it?

Not Another Clapotis!

Yes, I too am knitting the Clapotis shawl by Kate Gilbert. As of today, Ravelry.com says that 4,539 people have knit the Clapotis and 2,557 plan to. And that is just the knitters on Ravelry....

I just had to see what all the fuss was about!! I've actually been planning this project for awhile but am just now getting around to it. I am using the yarn called for in the pattern (Lorna's Laces Lion and Lamb) in the Gold Hill colorway. I really like how it is knitting up. The colors are really beautiful!


I'd like to offer a Clapotis class in April. That is if I get it finished before then!
Things just keep coming up!
Good thing I have Ava working on it as we speak..
Ava says,"Look Mama, I ninning!"
Father in Law's Fabulous Felt Clogs
I am one of those knitters that enjoys knitting for others. In fact it was just in 2007 that I started to actually keep any knitted items for myself. For years I gave away or sold every single item I made.

I especially love it if I can knit something for someone that they really need or want. About a month ago now my Father-in-law was complaining that he went slipper shopping and could not find any slippers to fit his gargantuan size 14 feet. So you can understand how I knew right then and there what I needed to do.

He needed some Felt Clogs.

The great thing about this pattern is that you can make all sizes of slippers. Even huge ones. In fact these slippers are even a tad too big! But the reason why is a whole other story....

I went to my parents to felt these suckers because it was the only top loading washer available to me at the time. It is a brand new super high efficiency washer. These slippers under the right felting conditions should take 10-15 minutes to felt down. My slippers were in the washer for *gasp* 3 hours!!!! The hot cycle was truly not hot at all so I had to manually load the washer with hot water from the sink. I also kept having to restart the agitation cycle a million times because it only lasted about 10 minutes, not to mention the agitator barely agitated! So 3 hours into it I knew they were a little bigger than I had hoped for but was too frustrated to care.

I guess I'll have to go to the laundromat next time.

I also sewed these great 2-piece slipper bottoms from Fiber Trends on there so that he wont slip and break anything. I sewed them on the others I made too. I think that they are especially necessary for little ones because they can be extremely accident prone.


So to make a long story shorter... my father-in-law likes them alot and I was really glad I was able to make him something that he will enjoy and use.

For these clogs I used Lamb's Pride worsted. My last clogs were made from Cascade 220. The Lamb's Pride made a fuzzier texture and worked just as well so I would say that these two yarns are both a great choice for this pattern.

I am still teaching classes on these clogs so go to the website to find out more information or call me at the shop.

(805) 466-Yarn

Sea Silk Contest

Remember this?

I purchased this beautiful skein of Sea Silk when I went to Santa Barbara last. Read more about that trip here. I am having a hard time finding the perfect pattern to make with this one skein.

I need your help, so I am going to offer a Sea Silk Contest! If you know of a great pattern using fingering weight yarn please leave a comment with the pattern name (so that I can look it up) or the web address that the pattern can be found.

Be sure to leave your email address or blog address so that I can contact you if you are the winner!


Contest Guidelines:
-All pattern ideas must be submitted by March 1st.

-I am looking for something wearable that will show off this yarn beautifully.
(Ideally I'd like to make a lacy shell or shrug.)

-The pattern must be able to be made with only 400 meters because that is all I have.

-The pattern must contain a picture of the finished item.

-Most importantly there will be a prize for the best suggestion. I will contact you if you are the winner and I will give you a choice between prizes.

I look forward to receiving all of your comments!
The Smock Coat Photoshoot
Here are a few...well several pictures of Ava wearing her new Smock Coat by Debbie Bliss.


I found out that it can be quite challenging to get a toddler to cooperate with picture taking. Do you notice that she won't look at the camera? She was too distracted...probably by her coat's gorgeousness... :)


This is the Smock Coat pattern out of the book Simply Baby. I made the 18-24 month size which fits Ava perfectly! It used 10 skeins of Debbie Bliss Cotton Cashmere in red. Is it just me or does that seem like a lot of yarn for a baby sweater? It must be because I used sizes 3 and 4 needles knitting needles. It is knit so tightly!

I just am in love with this baby coat. It is so elegant looking to me. Would I ever make it again? NO!!! Knitting cotton at that small of a gauge did a number on my hands and just was not enjoyable! I am however so happy that I stuck with it. I love the finished project!
This is the fourth sweater I have knit from the book Simply Baby. It's full of super cute baby patterns. Here are pictures of the other sweaters I knit in 2007. (Before the blog...)

Baby Shrug

Striped Sweater


Hooded Jacket

To sum up...Debbie Bliss rocks. I'm thinking about making the beret next to go with the coat.


Who am I kidding? I have so much knitting to do..
Its Finally Finished!!!
The Debbie Bliss Smock Coat is now completed!!! I just couldn't be happier about it. It is so cute and it fits Ava perfectly!! This picture does not do it justice but it was the best I could do without natural lighting. Tomorrow I hope to get a proper photo shoot with Ava modeling her new coat. I was so excited I just couldn't wait to share it with you.

Here are some pictures of the coat earlier before it was completely seamed.

I dont want to see any seed stitch or red fabric for awhile...